Package deployment
Package Deployment is both integrated with GLPI via massive actions and via the Plugin interface.
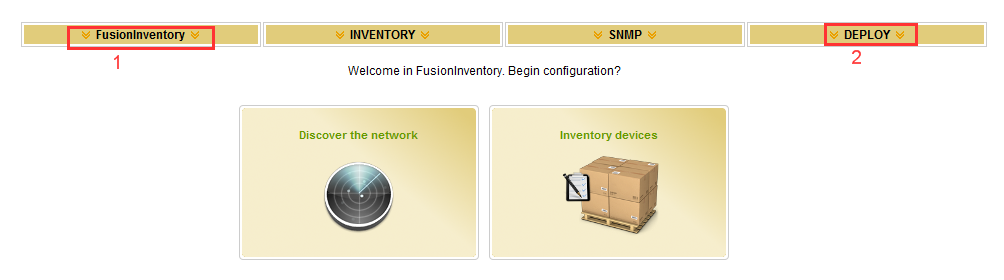
- Task Management is available via the FusionInventory dropdown. This is mostly used to deploy packages, but can be used for other tasks.
- The Deploy dropdown is used to create deployable packages.
FusionInventory Dropdown
Agents Management
This is used to quickly check the status of a FusionInventory agent:
- If it's reporting in.
- If GLPI knows about it.
- What it's TOKEN is (used to authenticate the server when pushing a task).
- What it's unique ID is (used to uniquely identify one agent from another).
Package Management
Create a package
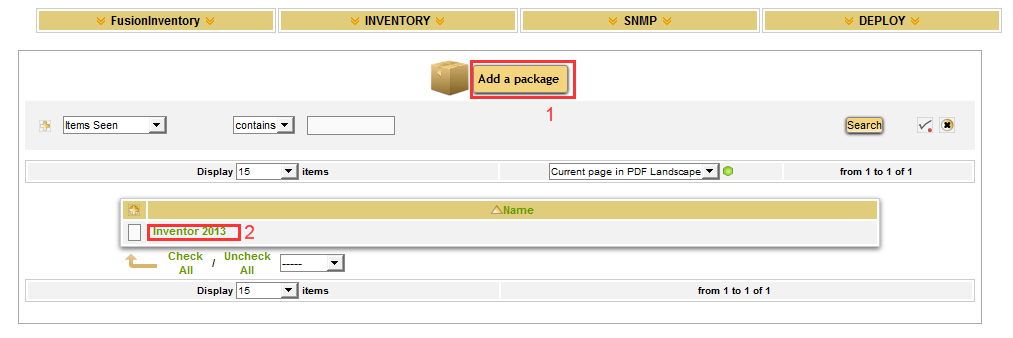
- Use Add a Package to create a new package.
- Click on an existing package to edit that package.
Edit package
You can add checks before running the package, but you can prefer to do that with the deployed scripts.
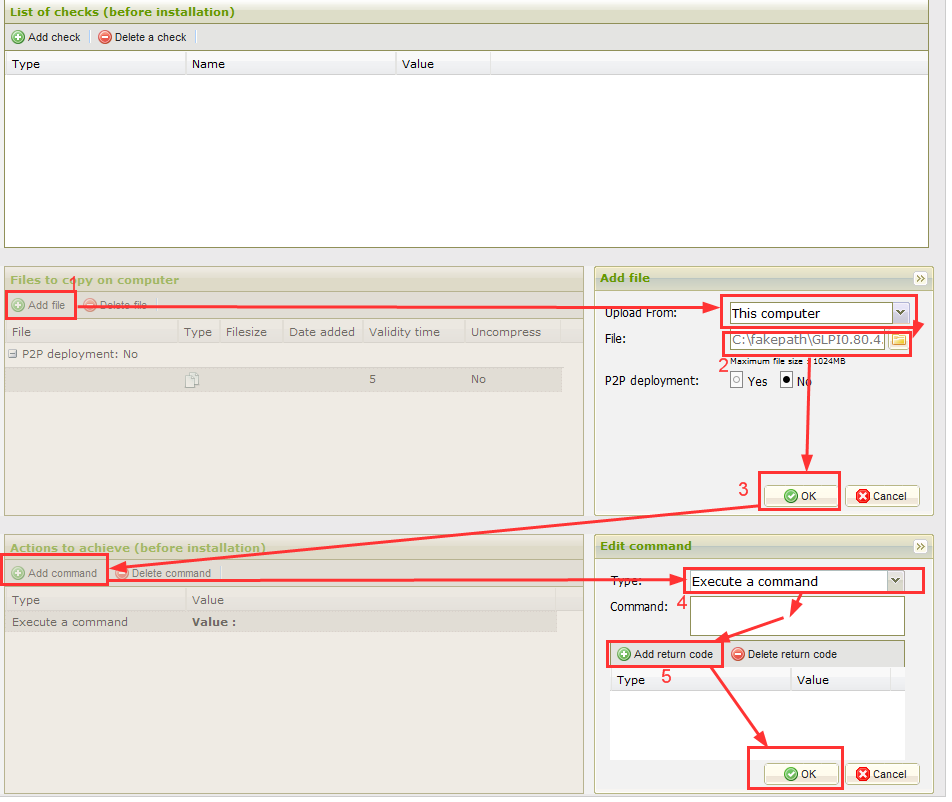
- Select to upload a file. You can upload a number of files, but must upload one at a time. You can also elect to upload a zip file.
- Select to get the file "From this computer". Use the browse button to select the file.
- With P2P enabled, computers will keep and share the downloaded files to the other computers of the LAN. This allow you to speed up a large download.
- If Extract is enabled, FusionInventory will try to extract the archive (.7z, .zip, tar.gz, .tar)
- Click OK and the file will be uploaded.
- Click on "Add command", select "execute a command" then type in the command you want, you can use the script
name here, but if you're doing something else, any valid windows command (use full path names) can be used.
- You can optionally add return codes to validate against for success or failure.
If you use "move" command, use "*" in case from if the agent get the file from GLPI
Task Management (Normal)
Please see the task creation page.
Creating a deployment task
Note
You must have created the package you want to deploy
FIRST. Please read that section if you need help with that.
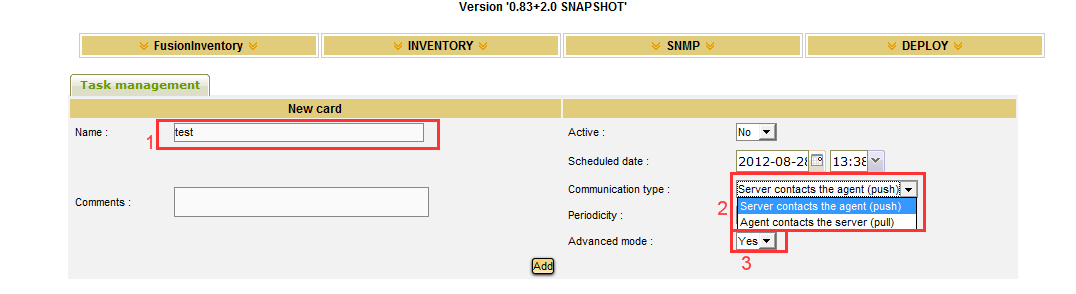
- Give the task a name
- Select the communication type (push or pull). Traditionally we have used Pull.
- Set Advanced mode to Yes.
Then:
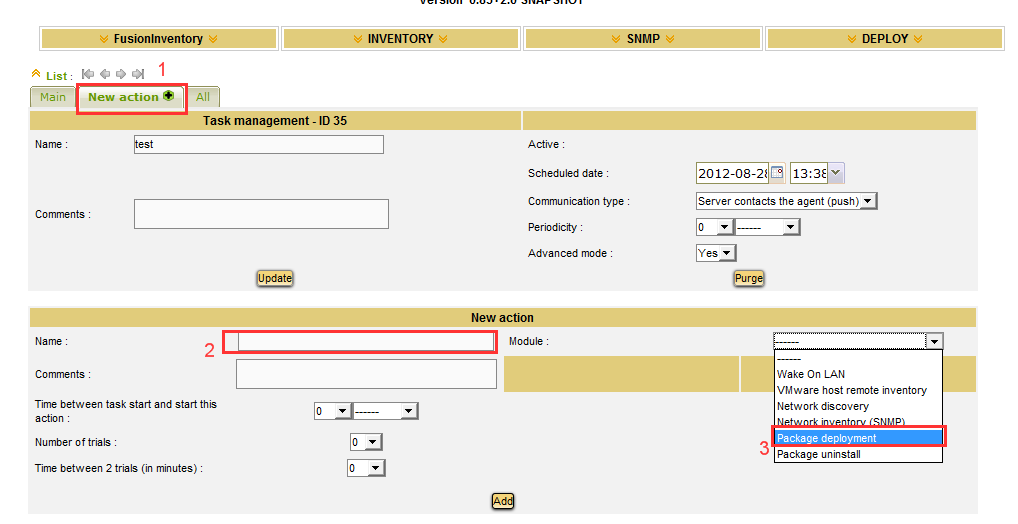
- Click on New Action
- Give the job a name (Optional)
- Select module to use - Package Deployment
Then:
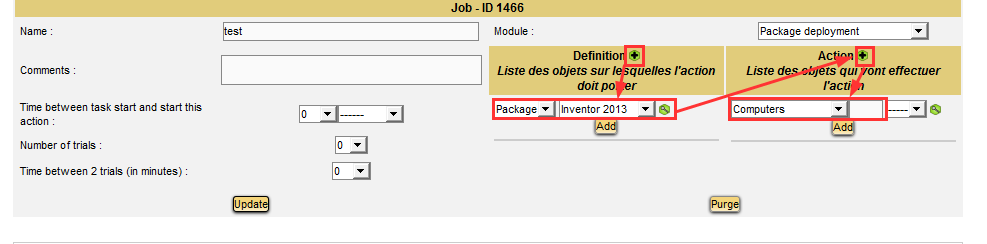
- Click the plus sign next to definition, select a package, click add.
- Click the plus sign next to Action, select computers etc, then use find as you type to add in the selection to apply the task to. Click add.
Assigning Computers to a deployment task via Mass Action:
- Make sure you have created but not activated a task and a deployment package.
- Use "Target a task" as the Mass Action section
- Select the existing non-active task.
- Select the existing deployment package.
- Click Post. This will create a new job for that task.
Running a Deployment Task
You can run a deployment task more than once, and it is separate from creating one.
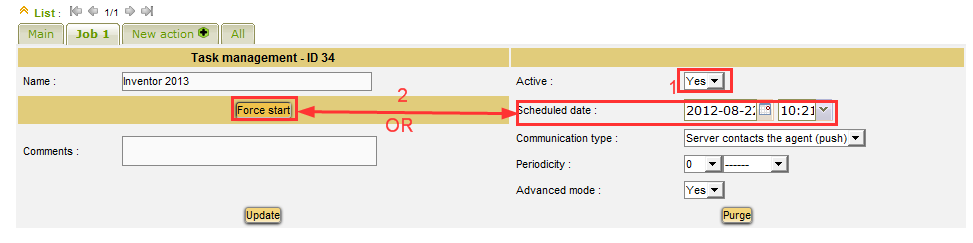
- First, set the task to Active and click update.
- Then either force the task to start immediately with "Force Start" OR schedule the task start and click update.
Checking a Tasks status
Running Jobs
When a job is running, you can see it by clicking on the FusionInventory menu and selecting Running Jobs.
Task status on a PC
When a task is running on a PC it will update information about its status. This log is saved after the task completes and can be reviewed from the Task Job page.

Deploy Dropdown
This dropdown is used to create packages for deployment and to edit them, list them and look at groups of computers (which are internal to fusion inventory, there are also separate groups used by GLPI for display etc).